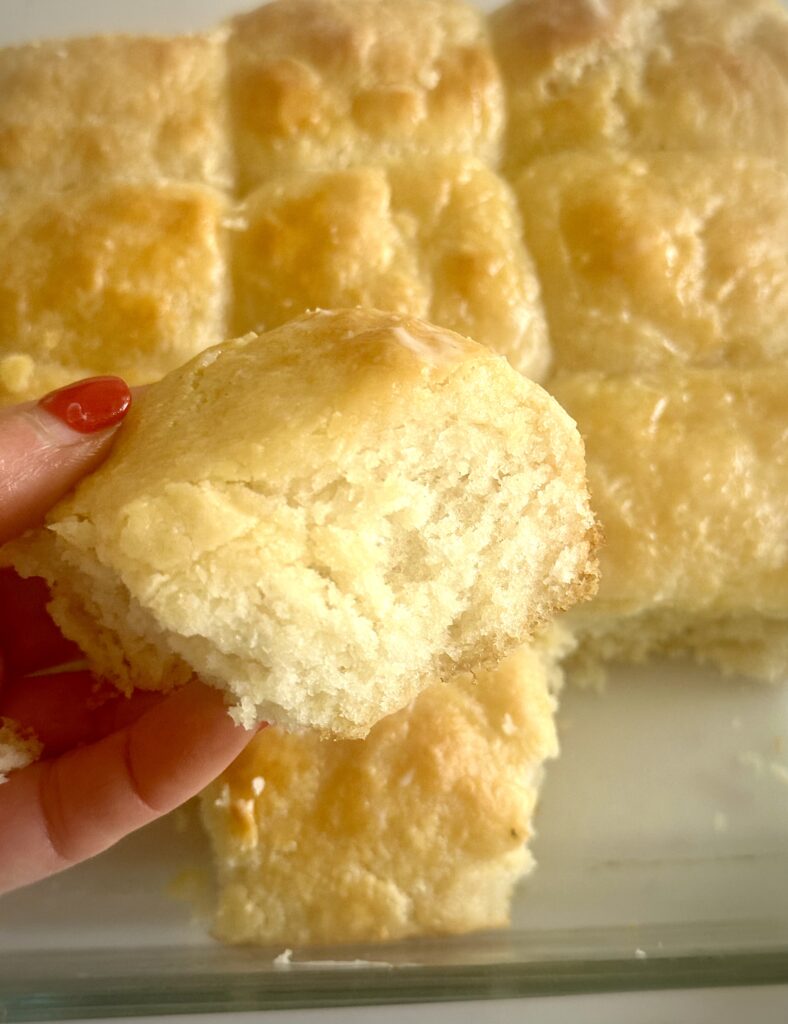
These buttery, pillowy-soft Sour Cream Angel Biscuits are made easier with Bisquick but still have the light, fluffy texture of classic yeast rolls. The sour cream keeps them tender, while a touch of sugar enhances the flavor. These rolls rise beautifully and bake up golden, with a soft pull-apart texture—perfect for any meal!
 There’s something about a soft, buttery angel biscuit that just feels like home. If you’ve never had one, imagine the perfect combination of a fluffy yeast roll and a tender Southern biscuit—light, airy, and melt-in-your-mouth delicious. That’s exactly what these Sour Cream Angel Biscuits deliver.
And the best part? This recipe is completely foolproof, thanks to Bisquick.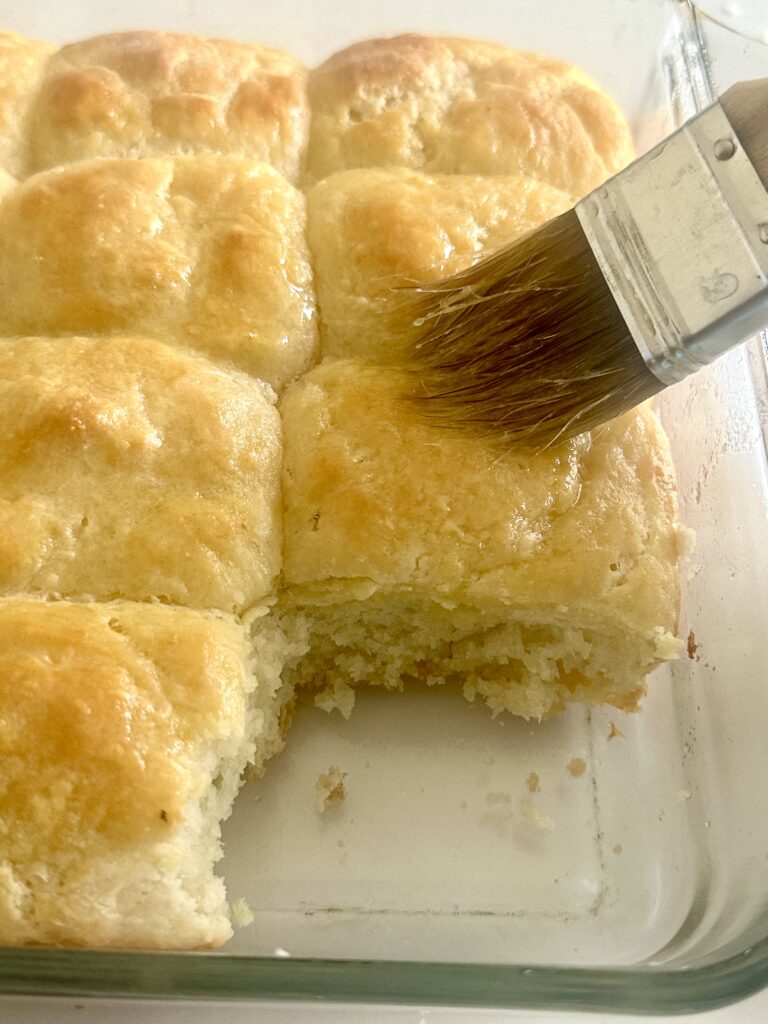
Why You’ll Love This Recipe
- No complicated steps – Traditional angel biscuits require a delicate balance of yeast and baking powder, but Bisquick takes out the guesswork while still delivering that perfect rise.
- Light, flaky, and full of flavor – The combination of sour cream, butter, and a touch of Crisco shortening gives these biscuits the perfect texture—rich, soft, and melt-in-your-mouth good.
- Perfect for any occasion – Whether you serve them at Sunday dinner, Thanksgiving, or just with a pot of homemade soup, they’ll steal the show.
What Makes These Biscuits “Angel Biscuits”?
Angel biscuits have been a Southern tradition for generations, often called “bride’s biscuits” because they’re so easy, even a beginner baker can’t mess them up. They’re made with both yeast and baking powder, which means they rise beautifully like a roll but stay tender and flaky like a biscuit.
While many recipes use traditional flour, I’ve found that Bisquick gives the absolute best texture—light, fluffy, and fail-proof. And when you add sour cream for richness, butter for flavor, and Crisco shortening for flakiness, you get the absolute best angel biscuit you’ve ever tasted.
Why Use Bisquick?
If you’ve ever struggled with homemade biscuits, this recipe is a game-changer. Bisquick already has the perfect ratio of flour, leavening, and fat, so you don’t have to stress over mixing. Then, by adding butter and Crisco, you get that extra tenderness that makes these truly bakery-quality.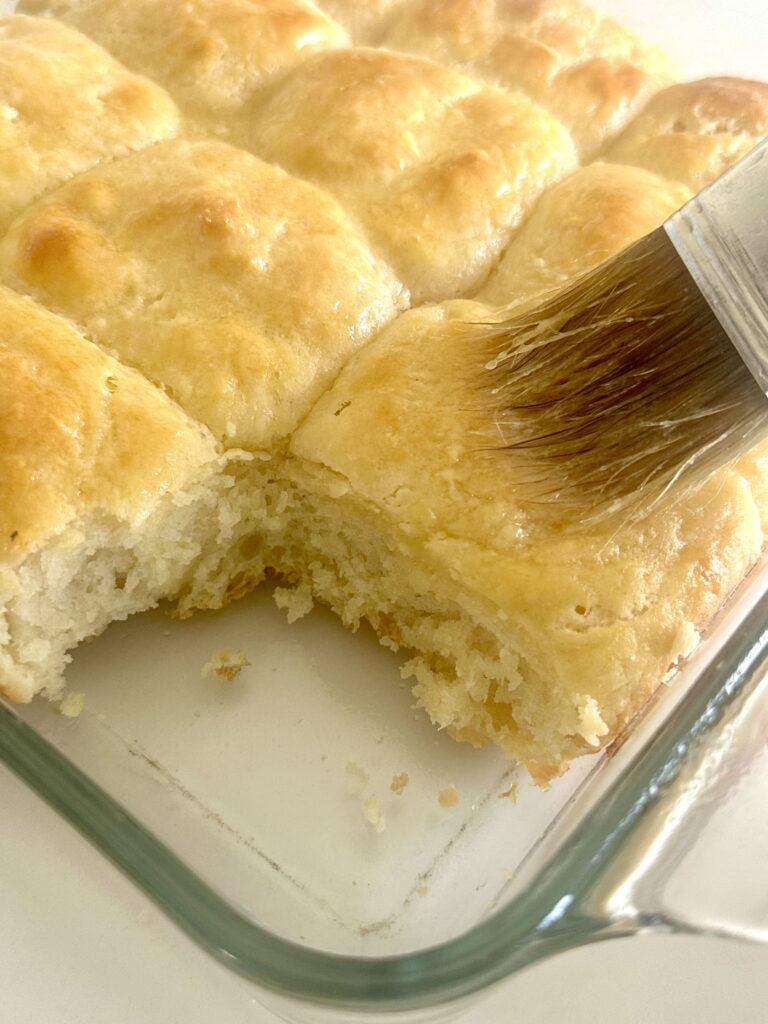
What You’ll Need for Easy Sour Cream Angel Biscuits. (Be sure to see the full printable recipe below this post.)
- Bisquick Baking Mix – A quick and reliable base that combines flour, leavening, and salt for soft, fluffy biscuits with minimal effort.
- Granulated Sugar – A touch of sweetness enhances the flavor and balances the tanginess from the sour cream.
- Unsalted Butter – Adds richness and a melt-in-your-mouth texture while creating those irresistible buttery layers.
- Vegetable Shortening – Helps create a tender crumb, giving the biscuits their signature lightness and flakiness.
- Sour Cream – The secret ingredient for extra moisture and a subtle tang, making these biscuits soft yet flavorful.
- Instant Rapid-Rising Yeast – Gives the biscuits a slight lift and airiness, making them a cross between a classic biscuit and a dinner roll.
- Warm Water – Activates the yeast and helps bind the ingredients together.
- Melted Butter (for brushing) – Brushed on top for a golden finish and extra buttery goodness and for extra goodness, add a touch of honey to the butter. Nothing more heavenly than a dollop of honey butter on hot angel biscuits!
- Fresh Thyme or Rosemary (Optional) – A fragrant finishing touch that adds a hint of herby flavor.
How to make Easy Sour Cream Angel Biscuits
- Prepare the yeast: In a small bowl, dissolve 2 teaspoons of sugar in ¼ cup warm (110 degrees) water. Note: If the water is too hot, it will kill the yeast. If the water is not hot enough, the yeast won’t activate. If you don’t have a thermometer, the water should feel like a baby’s bath water. This is an old Southern tip! Stir in the yeast and let it sit for 5 minutes until foamy.
 Mix the dry ingredients: In a large bowl, combine Bisquick with the remaining 2 teaspoons of sugar.
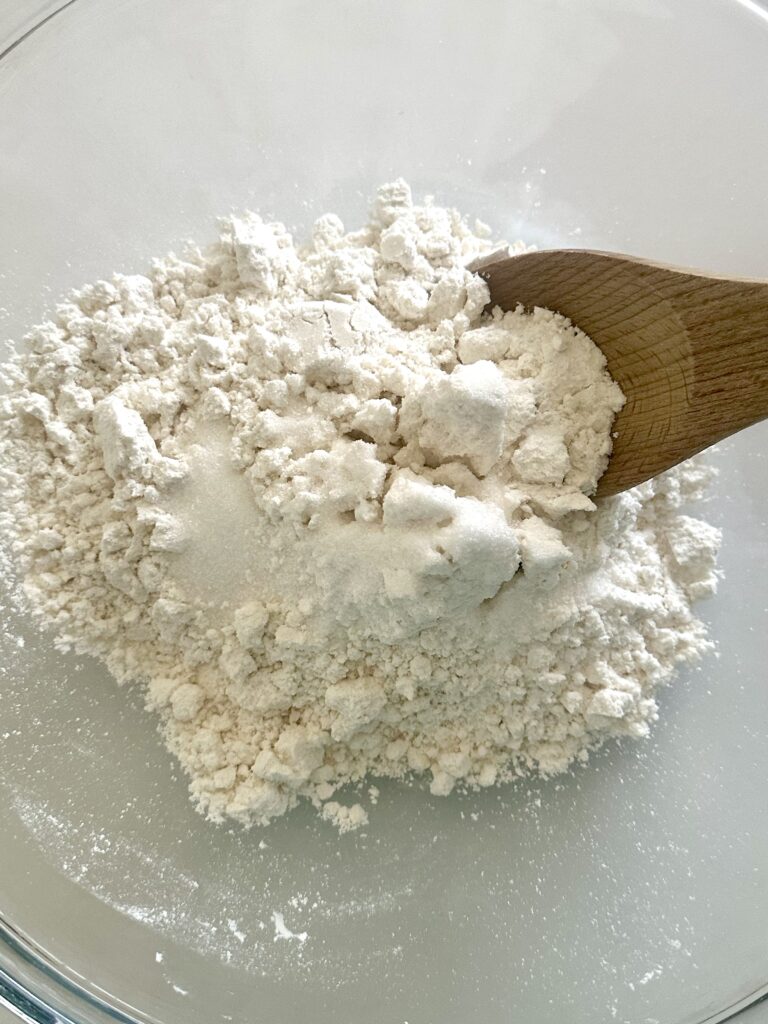
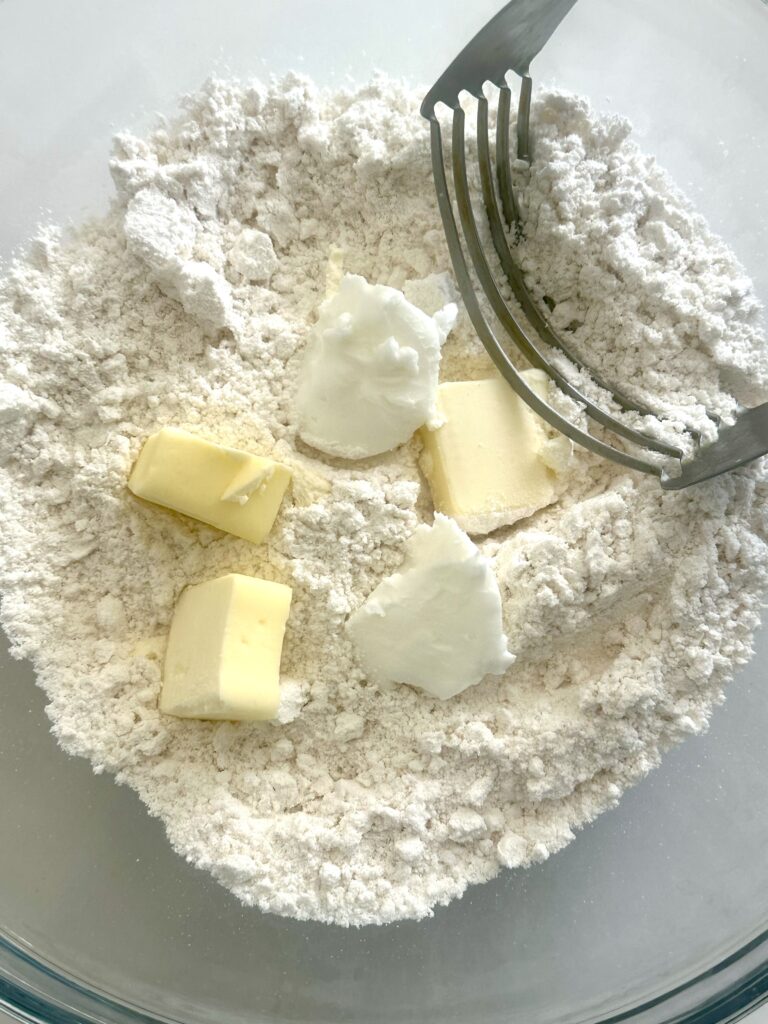
- Cut in the fats: Using a pastry cutter or fork, work in the butter and shortening until the mixture becomes crumbly.
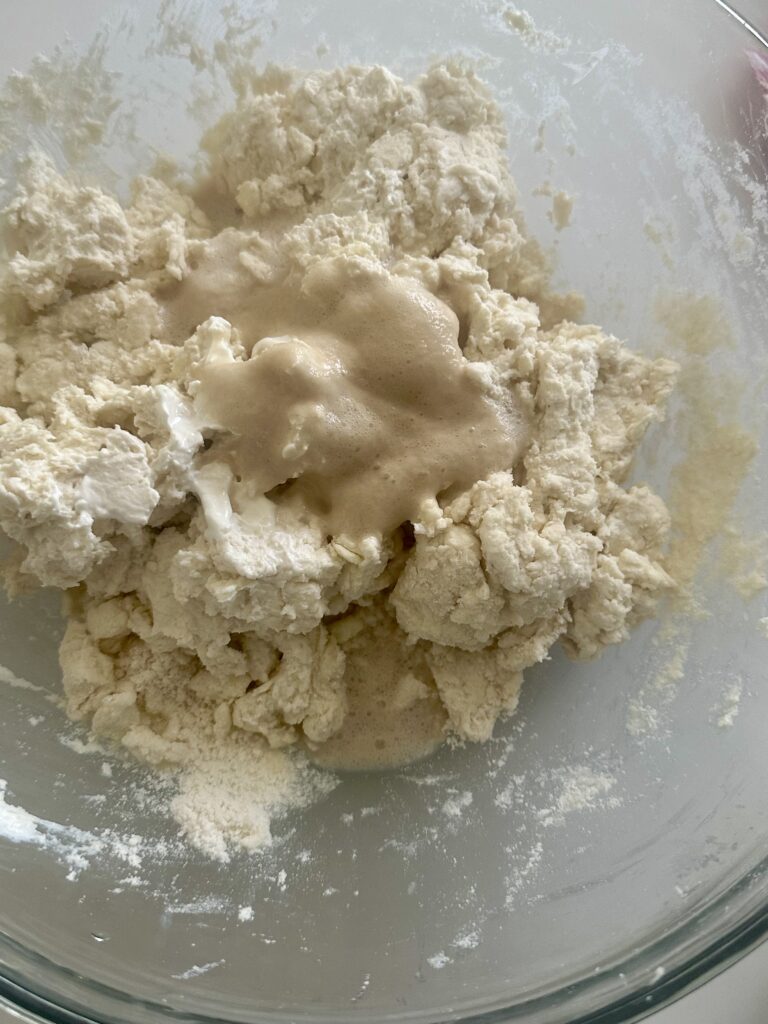
- Add the wet ingredients: Stir in the sour cream and the activated yeast mixture until a soft dough forms.
- Knead the dough: Lightly flour your work surface and knead the dough for 5 minutes until smooth and elastic.
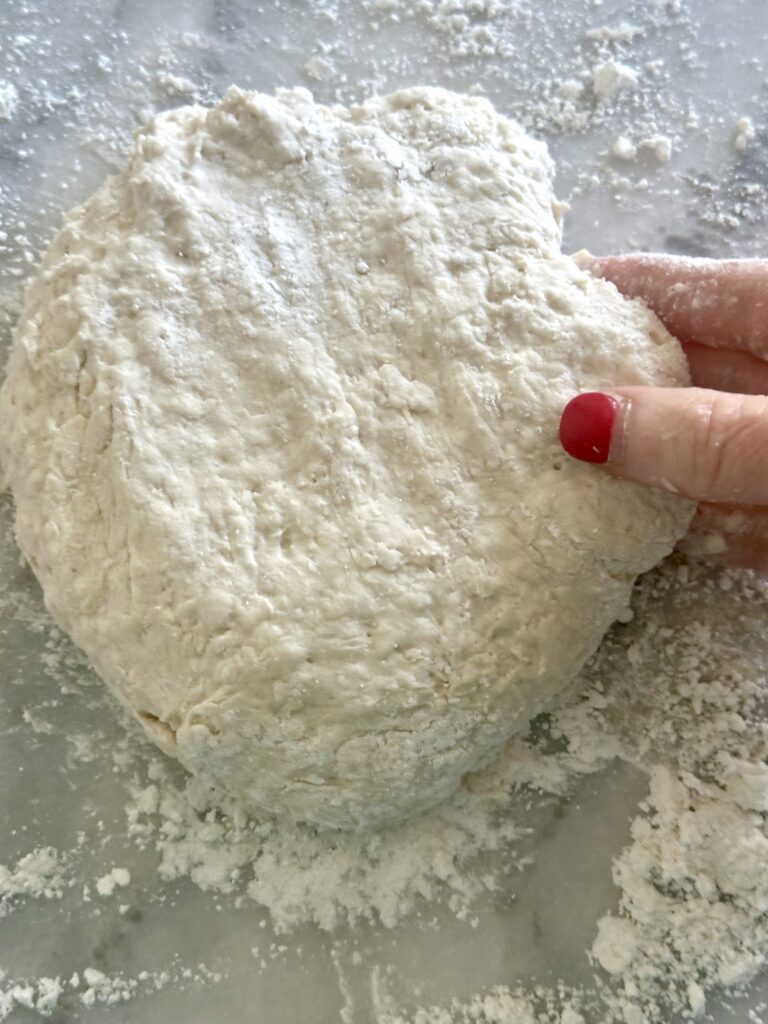
- Shape the rolls: Pinch off 12 equal portions of dough and roll them into smooth balls.
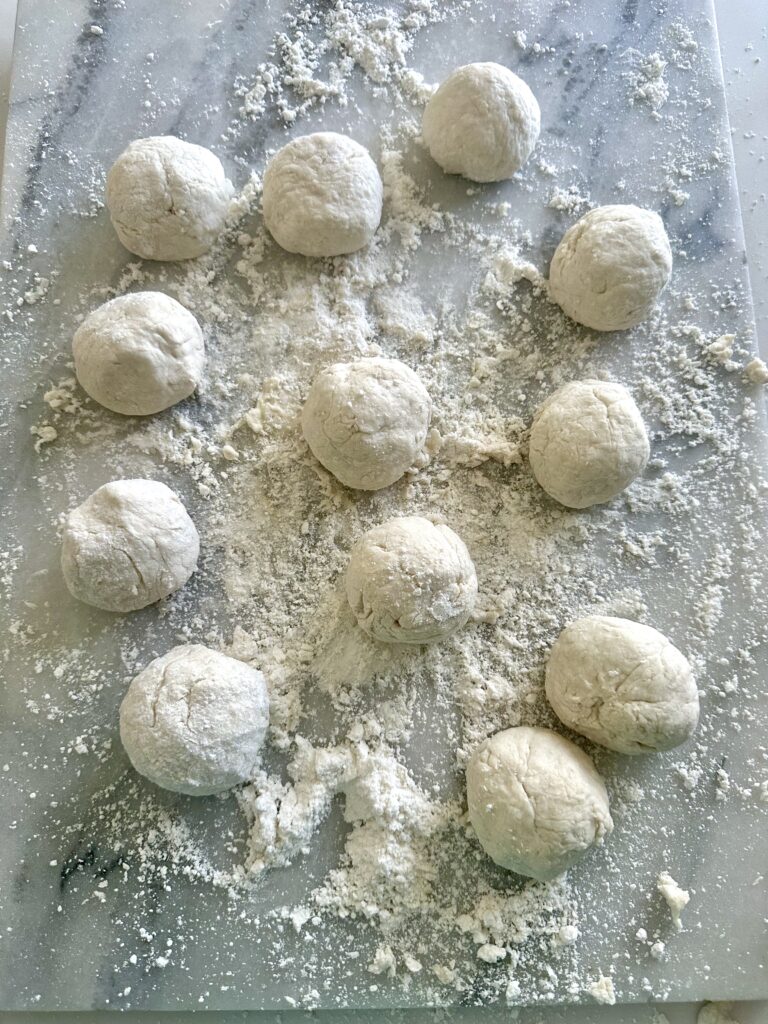
- Arrange & rise: Place the rolls snugly in a greased square 9×9-inch glass baking dish so they touch slightly (this helps them rise up instead of spreading out). Cover with a towel and let rise for 30 minutes in a warm place.
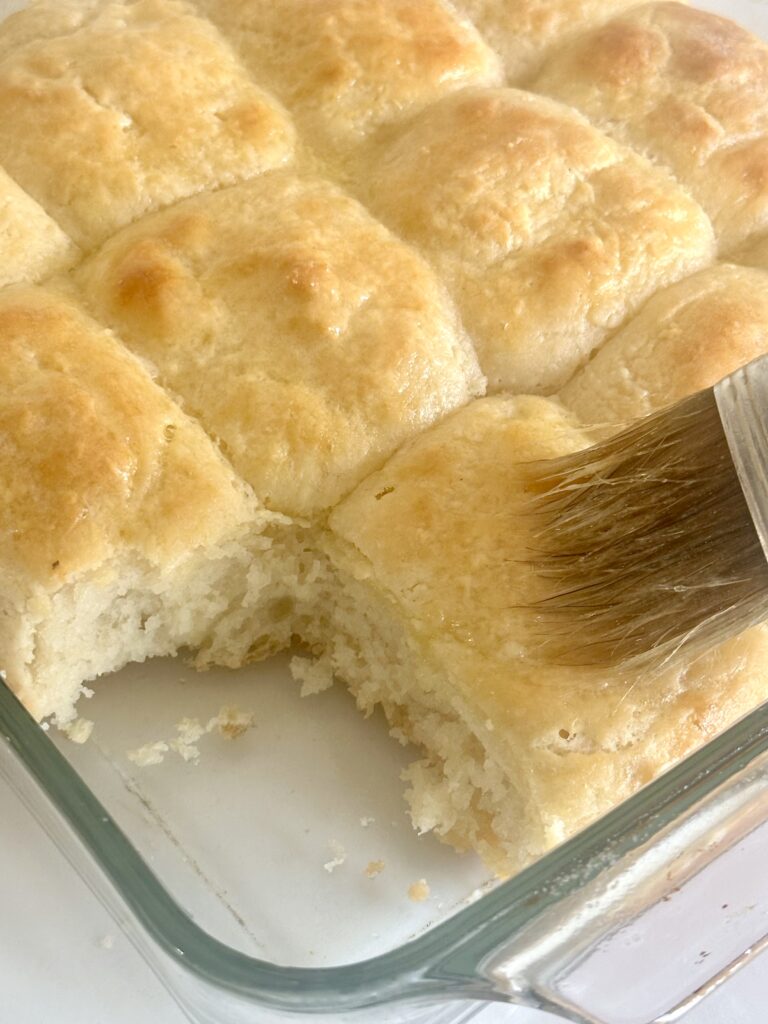
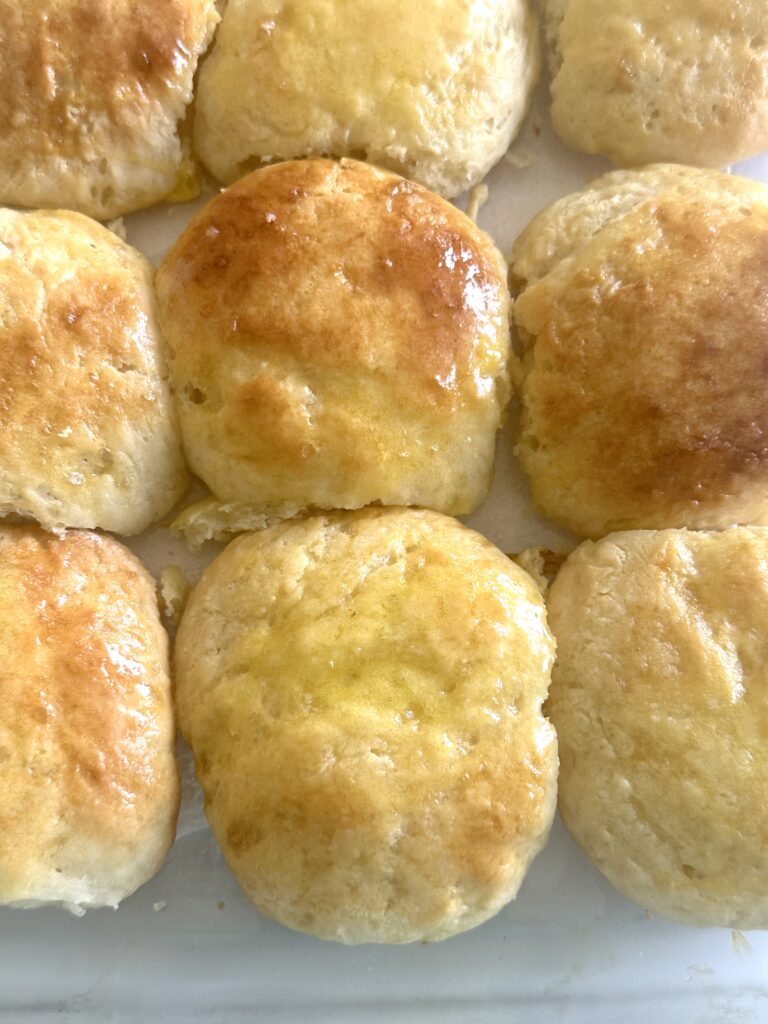
- Bake: Preheat the oven to 400 degrees. Brush the tops with melted butter (or herb butter if using) and bake for 12-15 minutes, until golden brown.
- Finish & serve: Remove from the oven and brush with more butter for extra flavor. Let cool slightly.
Tips for the Best Sour Cream Angel Biscuits
- Instant rapid yeast Is Your Best Friend: It’s quick, reliable, and doesn’t require proofing like active dry yeast. Adding two teaspoons of sugar helps to activate the yeast even more.
- Make sure that your butter and shortening are cold. Chilled fats will make your biscuits rise up better and keep them light and fluffy.
- Use a Glass Baking Dish: This helps the rolls bake evenly and get that beautiful golden crust.
- Customize Your Toppings: For a savory twist, brush with garlic butter and sprinkle with rosemary. For a sweet option, go with cinnamon sugar or honey butter.
- Freeze for Later: Once baked and cooled, freeze the rolls in an airtight bag. Reheat in the oven or microwave when ready to serve.
- Knead the dough: Why Knead the Dough?For sour cream angel biscuits, kneading the dough is important because it helps develop the structure of the biscuits while still keeping them tender. Here’s why:
- Even Distribution of Ingredients – Kneading ensures that the butter, shortening, and sour cream are evenly incorporated into the dough for a consistent texture.
- Activation of Gluten – While biscuits don’t need too much gluten development (like bread does), a little bit of kneading helps create a delicate but structured crumb that holds its shape.
- Flaky Layers – Gentle kneading encourages flaky layers by evenly layering the fat throughout the dough.
How Long to Knead?
- Knead the dough gently for about 30 seconds to 1 minute—just until it comes together smoothly but is still soft and slightly sticky.
- Avoid over-kneading, as that can make the biscuits too tough instead of light and fluffy.
A good method is to turn the dough out onto a lightly floured surface, fold it over itself 3 to 4 times, then gently press it together before rolling or cutting. This keeps the dough tender while ensuring good structure.
Perfect for Every Occasion
These sour cream dinner rolls are incredibly versatile. Serve them with:
- Breakfast: Spread with jam or honey butter.
- Dinner: Pair with soups, stews, or roasted meats.
- Holiday Gatherings: A show-stopping addition to your Easter, Thanksgiving, or Christmas table.
Variations to Try
- Savory Herb Butter: Mix melted butter with minced garlic, rosemary, and thyme.
- Sweet Cinnamon Sugar: Brush with butter and sprinkle with cinnamon and sugar before baking.
- Cheesy Goodness: Add shredded Parmesan or cheddar to the dough for extra flavor.
Storage & Freezing Tips
- Store leftovers in an airtight container at room temperature for up to 2 days or in the refrigerator for up to 5 days.
- Freeze: Place baked rolls in a freezer-safe bag and freeze for up to 3 months. Thaw at room temperature and reheat in a 300°F oven for a few minutes before serving.
With their golden tops and soft, tender centers, these Easy Sour Cream Angel Biscuits are the perfect blend of biscuit simplicity and yeast roll sophistication. Whether you’re new to bread baking or just looking for an easy, foolproof recipe, these rolls will quickly become a staple in your kitchen.
Go ahead—preheat the oven and let your home fill with the irresistible aroma of fresh bread. Your family (and your taste buds) will thank you! If you make these, be sure to let me know how they turn out.
Thanks for stopping by. I’ll be back soon with more delicious Southern recipes!
Aletia
Other recipes that you will love!
Be sure to leave a comment below if you have any questions about the recipe. I would love to hear from you and if you make it, be sure to use #deliciouslysouthern and let me know how you like it. Lastly, please follow me on Instagram, Pinterest, and Facebook.
Click here to purchase an autographed copy of my cookbook “Deliciously Southern “. It features over 370 delicious Southern recipes!Deliciously Southern (Autographed Edition)


Easy Sour Cream Angel Biscuits
 Prep Time: 10 minutes-Plus 30 minutes rising time
- Cook Time: 12 to 15 minutes
- Total Time: -58285102.9 minute
 Yield: 12 rolls
 Category: Bread
Description
These buttery, pillowy-soft Sour Cream Angel Biscuits are made easier with Bisquick but still have the light, fluffy texture of classic yeast rolls. The sour cream keeps them tender, while a touch of sugar enhances the flavor. These rolls rise beautifully and bake up golden, with a soft pull-apart texture—perfect for any meal!
Ingredients
2 ¼ cups Bisquick baking mix
4 teaspoons granulated sugar,
divided
2 tablespoons unsalted butter,
(Chilled)
2 tablespoons vegetable shortening
(Chilled)
1 cup sour cream
1 packet (2 ¼ teaspoons) instant
rapid dry yeast
1/4 cup warm water (110°F)
Butter, melted, for brushing (Honey
butter is also my favorite on angel
biscuits
(Optional: Fresh thyme or rosemary
for brushing on top with butter
Instructions
- Prepare the yeast: In a small bowl, dissolve 2 teaspoons of sugar in ¼ cup warm (110 degrees) water. Stir in the yeast and let it sit for 5 minutes until foamy. Note: If the water is too hot, it will kill the yeast. If the water is not hot enough, the yeast won’t activate. If you don’t have a thermometer, the water should feel like a baby’s bath water. This is an old Southern tip!
- Mix the dry ingredients: In a large bowl, combine Bisquick with the remaining 2 teaspoons of sugar.
- Cut in the fats: Using a pastry cutter or fork, work in the butter and shortening until the mixture becomes crumbly.
- Add the wet ingredients: Stir in the sour cream and the activated yeast mixture until a soft dough forms.
- Knead the dough: Lightly flour your work surface and knead the dough for about 2 minutes until smooth and elastic.
- Shape the rolls: Pinch off 12 equal portions of dough and roll them into smooth balls.
- Arrange & rise: Place the rolls snugly in a greased square 9×9-inch glass baking dish so they touch slightly (this helps them rise up instead of spreading out). Brush with warm melted butter and cover with a towel and let rise for 30 minutes in a warm place.
- Bake: Preheat the oven to 400 degrees. Gently brush the tops with more melted butter (or herb butter if using) and bake for 12-15 minutes, until golden brown. Note: Be careful not to brush too hard because the biscuits will deflate.
- Finish & serve: Remove from the oven and brush with more butter for extra flavor. Let cool slightly before serving warm. Enjoy!
Notes
Storage & Freezing Tips
- Store leftovers in an airtight container at room temperature for up to 2 days or in the refrigerator for up to 5 days.
- Freeze: Place baked rolls in a freezer-safe bag and freeze for up to 3 months. Thaw at room temperature and reheat in a 300°F oven for a few minutes before serving.
Nutrition
- Serving Size: 1 biscuit
- Calories: 180
- Sugar: 2g
- Sodium: 380mg
- Fat: 9g
- Saturated Fat: 4g
- Carbohydrates: 22g
- Fiber: 1g
- Protein: 3g
- Cholesterol: 10mg